Why layer lines are visible (and why paint highlights them)
The print is finished, the part is clean, the paint is ready. Then you tilt the model under the light and you see everything: the layer lines, like the steps of a staircase seen from the side. And if you then apply a coat of glossy paint, those lines become even more obvious: gloss is a magnifying glass for the surface topography.
The traditional solution is sanding. Grit 120, then 240, then 400, clean, primer, sand again, paint. It works, but it is a slow, dusty cycle that is hard to replicate on parts with fine details. And this is exactly where the filler primer changes the workflow: instead of removing material from the peaks, it adds material in the valleys. The result is a surface that is smooth to the touch and visually uniform, ready for paint, without sanding as a mandatory step.
Why sanding is the real bottleneck of post-processing
The FDM printing deposits filament in layers. Each layer leaves a stepped profile: the layer height, typically between 0.1 and 0.3 mm, determines the distance between one ridge and the next. On a flat surface the phenomenon is barely noticeable; on a curve, in an engraving, or on an inclined detail it becomes obvious. You can feel it by touch. Under glossy paint it is amplified.
Sanding reduces the ridges, but it has three hidden costs.
1. Labor time. Sanding is manual, repetitive, and hard to automate on small or complex parts. In production, finishing can account for up to 60% of the total cost of a 3D-printed component: it is the least predictable phase of the process, the one in which quality depends on the operator. We also discussed it in the guide to advanced post-processing techniques.
2. Dust and contamination. Dust from PLA, PETG, or ABS is not just a nuisance: it must be managed with a mask, extraction, and cleaning. Each additional step introduces a risk of contamination between one abrasive and another, and each grit requires setup time.
3. Loss of detail and tolerances. Each pass of sandpaper rounds an edge, wears away raised lettering, enlarges a hole. On an aesthetic part it is an acceptable compromise; on a functional component or a miniature, it can ruin the work.
Filler primer tackles the problem from another angle: it does not try to make the surface perfect by removing material, but makes it uniform by adding a controlled layer. It is a change of perspective that, on many parts, is worth more than any sander.
How a filler primer works (and why it is not a paint)
A spray filler primer is a base coat composed of a film-forming resin, mineral fillers, solvents, and propellant. When you spray it, the solvents evaporate and a film remains on the surface that:
- fills the valleys between one layer and another;
- covers the micropores and the lines left by abrasives;
- creates a matte, uniform base on which the paint adheres better;
- evens out the starting color, useful when you need to paint a part printed in black a light color.
It is different from a traditional primer: a normal primer prepares adhesion and covers, but does not have enough filler load to fill. It is also different from paint: it is not intended to be the final finish. It is an intermediate, sacrificial layer that builds thickness.
If you have searched for “spray filler for 3D printing”, you are on the right track: it is a common way to refer to a high-build filling primer. The difference between products lies in the formulation, compatibility with plastic, and filling power.
And it is not even the same mechanism as chemical smoothing. Acetone and vapors soften or dissolve the material; filler adds material. They are two different routes, with compatible materials and different risks. Filler does not “melt” the surface: it coats it.
What to expect: limits, thickness, and defects that filler does not solve
The promise “without sanding” must be read correctly: you do not have to sand to eliminate layer lines. It does not mean that filler repairs any defect. This distinction is important, because it is the difference between a professional result and a disappointment.
| Defect | Does filler solve it? | What to do |
|---|---|---|
| Layer lines on curved and inclined surfaces | Yes, with 2 thin coats | Apply at 20–30 cm, without buildup |
| Microporosity and light scratches | Yes | Clean and degrease before application |
| Oozing, stringing, layer shift | No | Remove them mechanically beforehand |
| Warping and raised corners | No | It is a process issue: review printing and adhesion |
| Deep holes or cracks | Partially | Multiple coats, with complete drying between coats |
| Threads, holes, joints | No, or only with masking | Mask the critical areas |
| Transparency | No | The filler is white and opaque |
The filler builds thickness. Two coats increase the dimensions of the part. On threads, bearing seats, snap fits and tight couplings, even a few hundredths can be felt. The rule is simple: two thin coats, never applied wet, and mask everything that must not be coated.
Drying is not a detail. The filler must dry completely, for at least 24 hours. If you paint earlier, you trap solvents and compromise adhesion and finish. Time can vary with temperature, humidity, and coat thickness: it is better to wait an extra day than to redo the piece.
Filler primer vs sanding, acetone, and resin: the comparison
There is no single best method. There is the right method for the piece, the material, and the time you have.
| Method | Materials | Time | Quality | Risks | When to use it |
|---|---|---|---|---|---|
| Hand sanding | FDM, all materials | High | Good/high | Dust, loss of detail | Small parts, touch-ups, competition-grade finishes |
| Spray filler primer | FDM, SLS, resin | Low (active time) | High on layer lines | Thickness, solvents | Aesthetic prototypes, miniatures, props, small series |
| Acetone vapors | ABS, ASA | Medium | Very high, glossy effect | Toxicity, deformations, cracks | ABS/ASA only, sturdy parts |
| Heat gun | PLA, PETG (with caution) | Low | Irregular | Local deformations, uneven gloss | Spot touch-ups, not entire surfaces |
| Epoxy resin | FDM, SLS, resin | Medium/high | Very high | Weight, thickness, bubbles | Large props, sculptural pieces |
| Finer layer height (0.08–0.12 mm) | FDM | Much longer print time | Good | Does not completely eliminate lines | Small pieces, detail, prevention |
Filler is the fastest choice when the problem is layer lines on a piece to be painted. Acetone vapors can give a glossier surface, but they work mainly on ABS and ASA, require a dedicated chamber, and carry a risk of deformation that filler does not have. Epoxy resin is unbeatable on large sculptural surfaces, but it adds weight and requires more manual work. Sanding remains irreplaceable for correcting geometries and touching up localized spots.
How to choose the best filler primer for 3D printing
Not all filler primers are the same. Before buying, look at these five aspects.
- Filling power. A traditional primer covers; a filler fills. Look for a product explicitly labeled “filler” or “high-build,” not a simple universal primer.
- Material compatibility. It must be specified for FDM and, if you work with SLS or resin, also for those technologies. On solvent-sensitive materials, a preliminary test is better.
- Drying time. A product that dries quickly but requires sanding does not save you time. Consider the total time of the workflow, not just drying to the touch.
- Color and coverage. Opaque white is ideal as a base for light colors and for seeing remaining defects. Transparent is another matter: it can even out micro-irregularities, but it does not have the filling power of a white filler.
- Safety and format. Aerosol means solvents, flammability, and the need for ventilation. Check the warnings, compatibility with your workspace, and the yield of the format.
A good filler primer is not the one with the largest can: it is the one that gets you to the paint with fewer steps and fewer surprises.
3DBooster Filler: the filler primer for FDM, SLS and resin prints
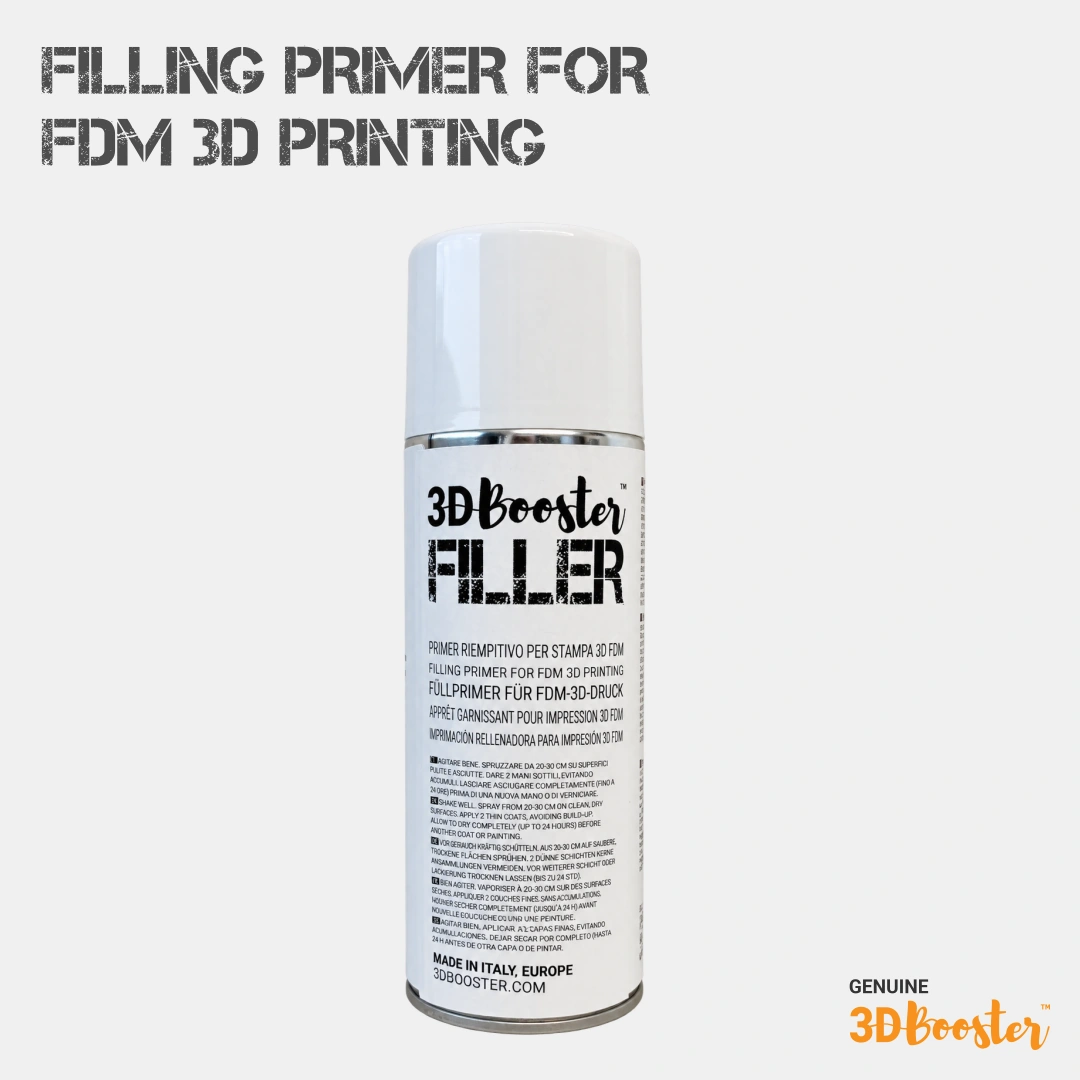
3DBooster Filler is a white spray filler primer, formulated for FDM 3D printing and also suitable for SLS and resin prints. It is produced in Italy, in a 400 ml format, and was created for a precise workflow: printing → cleaning → filler → painting → protection.
| Item | Detail |
|---|---|
| Code | F.S.FLR.400W |
| Format | 400 ml |
| Color | White |
| Type | Spray filler primer (aerosol) |
| Compatibility | FDM, SLS and resin 3D printing |
| Application distance | 20–30 cm |
| Application | 2 thin coats |
| Drying | At least 24 hours |
| Painting | After complete drying, with a preliminary test |
| Premium finish | 1–2 coats of 3DBooster UV-Shield |
| Made in Italy | Yes |
The features that really matter in the lab:
- Opaque white: creates a uniform base and makes any remaining defects visible.
- High filling power: fills layer lines and obvious defects, not just microporosities.
- Without sanding: eliminates sanding as a mandatory step on most parts.
- Wide compatibility: FDM, SLS and resin.
- Two thin coats: easy application, with no buildup.
- Paintable: compatible with a wide range of paints, with testing on a scrap piece.
- Premium finish: 1–2 coats of UV-Shield for depth, gloss and UV protection.
Filler and UV-Shield: two products, two roles
They are complementary, not alternatives. The Filler is the high-filling white primer: it builds thickness and erases lines. UV-Shield is the UV-resistant acrylic clear coat: it protects, adds gloss, and gives depth. If you only want a protective veil on an already good surface, UV-Shield may be enough; if you need to hide layer lines, start with Filler.
How to apply 3DBooster Filler step by step (without sanding)
Safety before you start. 3DBooster Filler is an extremely flammable aerosol. It contains xylene, acetone, and n-butyl acetate: it may irritate eyes and skin and cause drowsiness or dizziness. Use in a ventilated area, away from flames, sparks, and hot surfaces. Wear gloves and eye and face protection. Do not puncture or burn the can, even after use. Do not expose to temperatures above 50 °C. Keep out of reach of children. Always follow the warnings on the can.
What you need: 3DBooster Filler, 3DBooster Fineclean, nitrile gloves, eye and face protection, a mask, masking tape, and a scrap piece to test the paint.
Time: 15–20 minutes of active working time, plus at least 24 hours of drying.
1. Prepare the part
Remove supports, stringing, and residues. Blow away the dust. If you have sanded, remove every trace of dust with compressed air or a clean cloth. The surface must be dry.
2. Degrease
Oils, hand residues, and contaminants prevent adhesion. 3DBooster recommends Fineclean on clean, dry surfaces. Let it evaporate before applying the filler.
3. Mask off what you do not want to coat
Threads, holes, recesses, bearing seats, mating surfaces. The filler adds thickness: if you do not want to change a tolerance, cover them.
4. Shake the can well
Shake until you hear the ball moving continuously. An unshaken product applies an uneven mixture, with fillers separated from the resin.
5. Spray at 20–30 cm
Cross passes, two thin coats. Do not stop on the same spot. Better two light passes than one wet pass: drips are difficult to correct and buildup hides details.
6. Dry for at least 24 hours
Away from sunlight, at room temperature. Do not apply varnish before: trapped solvents ruin adhesion and finish. If deep lines remain after 24 hours, apply another thin coat and wait another 24 hours.
7. Apply varnish
Always test on a scrap piece to check adhesion and varnish compatibility. Generally one coat is sufficient.
8. Apply the premium finish
When the varnish is dry, apply 1–2 coats of 3DBooster UV-Shield at 20–30 cm. The clear anti-UV acrylic provides gloss, depth and protection from UV rays.
Glossy, deep finish: pair Filler and UV-Shield
A matte white primer is not a finish. It is a base. The difference between “painted” and “premium finish” lies in the clear layer.
3DBooster UV-Shield is a glossy clear acrylic varnish, resistant to UV rays, weathering and up to 240 °C. Applied in 1–2 coats after the paint, it does three things:
- brings the gloss to a wet look;
- gives depth to the color, especially on dark and metallic shades;
- protects the paint from UV, light and external agents, reducing fading.
It is particularly useful on pieces intended for outdoors, exhibitions, handled objects or display miniatures. On a piece that stays indoors the aesthetic gain is still there; UV protection is a bonus.
Mind the order: Filler → 24 hours → paint → drying → UV-Shield. Reversing the layers or applying UV-Shield to filler that is not dry means trapping solvents and compromising the finish.
The mistakes that ruin the finish (and how to avoid them)
- Coats that are too thick. The filler runs, creates buildup, and hides details. Better two thin coats.
- Wrong distance. Too close: concentrated spray and runs. Too far: dry dust, poor adhesion, rough surface. Stay between 20 and 30 cm.
- Failing to degrease. Dust and oils are the silent enemies of adhesion.
- Painting before 24 hours. Solvents remain trapped and ruin the finish.
- Not testing the paint. An incompatible paint can wrinkle or peel even after days.
- Forgetting threads and joints. Filler adds thickness: mask first, not after.
- Spraying in sunlight or high humidity. The film can become dull or dry unevenly.
- Using filler on TPU or sensitive materials without testing. On flexible parts the finish can crack; on solvent-sensitive materials, an overly wet coat can attack the surface.
- Expecting it to repair structural defects. Stringing, warping, and layer shift cannot be solved with a spray.
If the primer seems to make the lines stand out. Sometimes the first coat does not fill, but it makes the surface more uniform and therefore easier to read under raking light. It is not a worsening: it is the signal that a second thin coat is needed. Avoid compensating with wet passes, which create buildup and runs. Wait for it to dry, check with diffused light, and evaluate the result after the second coat.
When filler primer is not the right choice
Filler is a tool, not a universal solution. Do not use it, or use it with extreme caution, when:
- the part has tight mechanical tolerances, threads, gears, bearing seats, or snap fits;
- the surface must remain transparent;
- the defect is structural: warping, layer shift, under-extrusion, deep cracks;
- the part is intended for food contact or a medical application: specific materials and certifications are required, not an aesthetic primer;
- the material is very sensitive to solvents or flexible, and you have not done a preliminary test.
A good post-processing workflow is not “filler everywhere”. It’s filler where needed, sanding where needed, and no treatment where the part is already functional.
How much time do you really save? A concrete example
Take a part that requires 45 minutes of manual sanding. At €25/h in labor, that’s about €19 in cost just for sanding, not counting abrasives, masks, cleaning, and dust disposal. With filler, application drops to 5–10 minutes; even adding cleaning and masking, you stay around 15–20 minutes. The rest is passive waiting, which you can use to print or work on other parts. The savings aren’t in the can: they’re in human time.
On a small batch of 20 parts, the difference becomes clear: 15 hours of sanding versus 2–3 hours of application, with more repeatable quality. Of course, the math holds if the filler actually covers the lines on your part. On very high layers or complex geometries, you may need more coats or localized touch-up: the savings remain, but must be measured for your case.
Conclusion: from printing to painting, without sanding
Filler primer is not a magic shortcut: it’s a smarter way to manage post-processing. It shifts the work from manual sanding to the controlled application of a layer that fills, and makes the finish more repeatable. For parts where layer lines are the main problem, it’s one of the few solutions that saves time without sacrificing detail.
3DBooster Filler is available in a 400 ml format, Made in Italy. Launch price €19 until November 15, 2026 (full price €23), free shipping in Italy. Discover 3DBooster Filler →
For the complete workflow: Fineclean to clean and degrease, Filler to fill, UV-Shield for the glossy and anti-UV finish.